Little Red Riding Hood Nails

If you’re a fan of the musical Into the Woods, you’ll recognize the scene on my nails from the Little Red Riding Hood feature where the wolf and Red sing “Hello Little Girl.” Even though this manicure is stamped, it was probably one of the most labor intensive stamping designs that I’ve ever done and uses several different techniques to bring the images to life.

I started with a rich shimmery forest green polish from Julep called Giselle. You only need to apply 2 coats of polish to achieve the same color that you see in the bottle, and it’s beautiful all on its own.

img_20190724_153651

Continue reading

Purrfect Together Valentine’s Day Manicure

Happy Valentine’s Day! ❤ I’m going to show you a “Purrfect Together” Valentine card design that I created for the occasion.

I started by painting my nails with 022 Rose Nude from Aimeili. It is a beautiful classic sheer light pink creme shade. I applied and cured 3 coats for one minute each in a 36W UV/LED lamp.

IMG_20190213_000603.jpg

022 Rose Nude from Aimeili.

Continue reading

Holographic Bubble Nail Art

I’ve still been feeling rather lazy and uninspired, so I again turned to the @clairestelle8challenge to help me through the week.  The prompt for January 21 was Circles, and I could have easily turned to my stamping plate collection, but I decided to challenge myself a little bit and try my hand at painting bubbles.

I started by applying a pearly white base color to all my nails.

img_20170120_212659.jpg

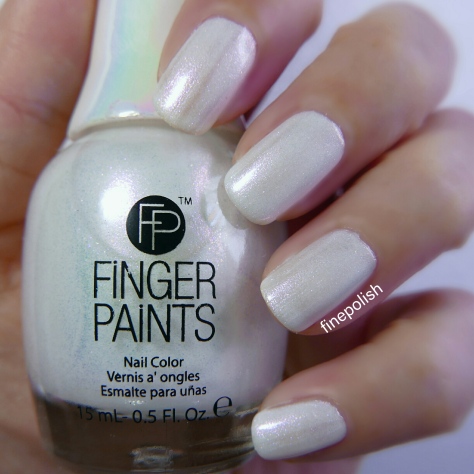
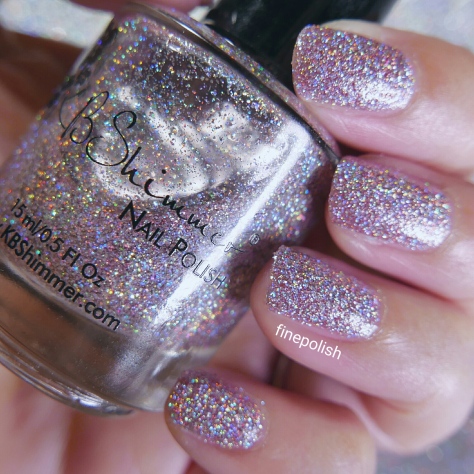
Of Quartz You Can by Finger Paints.

I came up with a rather clever trick to make bubble decals on a silicone mat.  The mat is from Bundle Monster, and I used Glisten & Glow’s HK Girl top coat to form the base of the nail decal.  I brushed an unused pencil eraser lightly with holographic polish and stamped it onto the dried top coat on the mat.  I repeated this technique many times and also with 2-3 different polishes applied to the same circular stamped area in order to get the mix of colors that you would typically see in a soap bubble.

img_20170120_232150.jpg

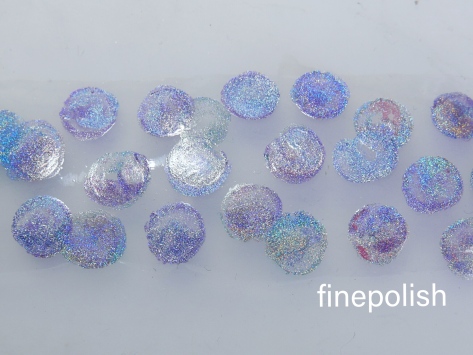
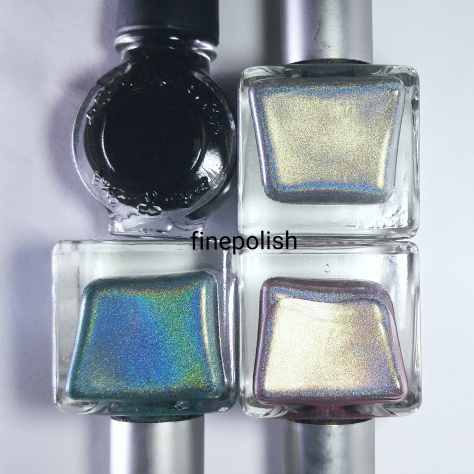
Rainbow colored holographic bubbles on my silicone mat. The polishes used include Pink Holo, Green Holo, and Purple Holo from UO Nail Lacquer and Tali from Julep.

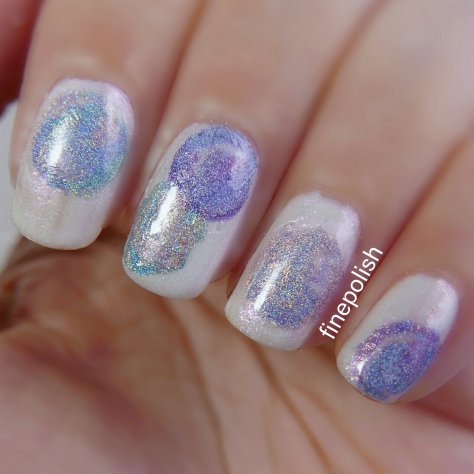
To use the decals, I carefully peeled the layer of polish from my mat and cut around the bubble(s) that I wished to use.  After painting my nail with a layer of Seche Vite top coat, I immediately placed the decal where I wanted it and allowed it to set.

img_20170120_234202.jpg

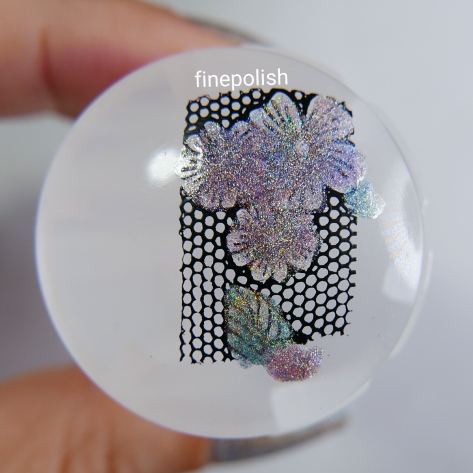
Nebulous orb shapes. They already looked like bubbles, but they needed a little more help.

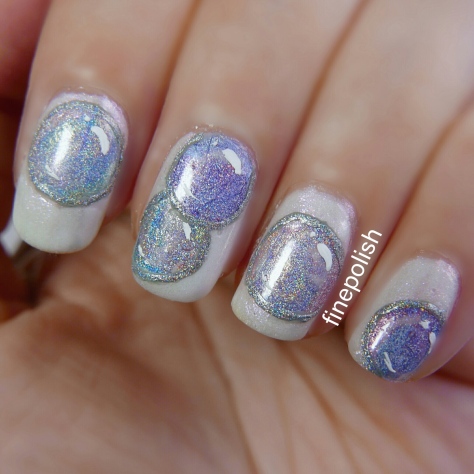
Using a detail brush, I outlined each bubble with craft smart acrylic paint in dark grey.  I also added a little bit of dimension to the bubble by adding a white highlight to the top right and bottom left side of each circle.  The dark grey paint contrasted too much with the design, so I ended up tracing the outlines again with Silver Holo from UO Nail Lacquer to make them blend more with the colors in the bubbles.

img_20170120_233357.jpg

Finishing touches.

After another layer of top coat over everything, my design was done.

img_20170120_235656.jpg

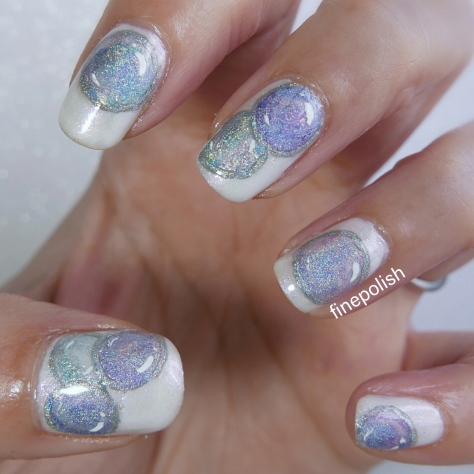
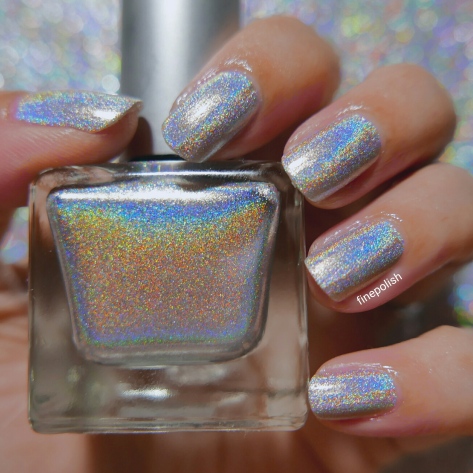
Soap bubble nail art. Just wish I had a thinner detail brush for the outlines.

img_20170120_235359.jpg

To be honest, they didn’t come out exactly as planned.  Holographic polish tends to be pretty opaque with even just a thin layer applied so my bubbles didn’t look as ethereal and transparent as I wanted them to be.  Also, the pencil eraser technique worked great, but it didn’t allow for any variation in size unless I purposefully wanted to carve down an eraser.  It still came out kind of cool, at least in concept.

Hopefully I get my inspiration back soon!  Happy polishing!


Lacey Stained Glass Manicure

I wanted to create a pretty manicure after my 3D nail experiment, so I turned to a classy plate from Harunouta for inspiration.

img_20160816_235822.jpg

Lace for days: Harunouta plate L-009.

My eyes were drawn to the lace strip in the center of the plate, so I decided to do some stamping in black over subtle holographic hues.  Did you know that Urban Outfitters released a line of holographic nail polishes a few years ago?  They are some of the best purchases I ever made.

img_20160823_213411.jpg

Clockwise from top left: Konad Special Nail Polish in Black, UO Nail Lacquer in Silver Holo, UO Nail Lacquer in Pink Holo, and UO Nail Lacquer in Green Holo.

img_20160708_001507.jpg

I painted all my nails with Silver Holo.

img_20160823_212410.jpg

I stamped the lace image with black polish and colored in the flowers with Pink Holo and the leaves with Green Holo.

Pro tip: Use several stampers so that you can let the polish dry completely as you fill in the image on the next stamper.  Failure to wait will cause the colors to smear outside of your outlines, and the decal will not transfer properly.

I used the brush from the bottle to fill in the design, but if you need more precision, a dotting tool or detail brush is handy.

img_20160823_212816.jpg

After stamping the design, some clean up, and top coat, your manicure is done!

The most time consuming work is coloring in the sections, but it really an easy manicure to do.  Plus it’s holo- how can you go wrong?

img_20160823_212254.jpg

Hope you enjoyed this design!  Happy polishing!

Pole Dancer Nails

After doing the silhouette of the rhythmic gymnast for my Olympics themed nails, I felt the urge to do something else with a silhouette.  Thankfully, I didn’t have to rely on my freehand painting skills for this one because I have a stamping plate that fits the bill perfectly!

img_20160731_122333.jpg

Can you get jiggy with it?  Plate BP-X07 from Born Pretty Store.

Seems to me like there were quite a few pole dancers and sexy girls on there, so I went with a holographic polish base to fit the mood.

img_20160808_161619.jpg

My holo polish of choice was Things That Make You Go Bloom by KB Shimmer.

img_20160808_163046.jpg

I used bmc nail lacquer in noir black to do the stamping, but I wasn’t that thrilled with the opacity.

img_20160808_162446.jpg

I ended up going over a lot of the images with craft smart acrylic paint in Black to intensify the silhouettes. The poles were corrected with paint and a striping brush, and I had to draw in the bust outline for the girl on the far left.

Of course, the lesson is to make sure you use good quality stamping polishes in the first place so that you don’t have to paint over your stamping to make it look good!  I suppose it would have looked fine in either case, but certain details didn’t get picked up from the plate so well, and my OCD wouldn’t let me leave things like that.

img_20160807_214856.jpg

My “pole” is actually my flute!

It’s still a cute idea, and it reeks of Showgirls.  Don’t you think Nomi Malone would approve?

Happy polishing!