Review of Rossi Nails Glam Powder Trial Kit

Hi, everyone! I’ve been away from the blog for awhile, but I’m still very active on Instagram. The stay at home orders during the pandemic have left me with a little more time on my hands, so I decided to make a post about dip powders for all of you adventurous do-it-yourself people out there. After all, the nail salons are closed, so now is a good time to experiment with new techniques!

Today I’m featuring a trial kit offered from Rossi Nails, a US based company. Their products are still made in China, but the formulas are developed in the USA. I tried a dip powder kit from Nicole Diary a few months ago but wasn’t so impressed with how long they lasted and especially did not like their top coat, not to mention that a lot of the activating liquids dried up in their bottles despite me not even using them that much. I was offered the chance to try out the Rossi brand and jumped at the new opportunity to have another shot at dip powder nails.

Why go for dip powder?

Continue reading

Review of Beauty Big Bang 3 Piece Brush Set

Hope everyone enjoyed their Thanksgiving! I’m back with a quick review of a 3 piece brush set from Beauty Big Bang.

img_20191124_160054

These brushes don’t come with a storage case although they do have protective open ended caps to preserve the brush heads during shipment. The handles are clear plastic and are labeled with sizes 0, 00, and 000. I’m guessing that Kolinsky is the name of the manufacturer.

img_20191124_160358

The end of the brush handle has an angled tip that can be used to push back cuticles.

Continue reading

Review of Beauty Big Bang Cuticle Nipper

Hello! Sorry for disappearing, but life has been crazy, and it’s hard trying to stay on top of a written blog. Definitely find me @finepolish on Instagram, Facebook, Tumblr, or Twitter if you want to keep up with all my latest designs!

Today I want to show you an item that I’ve been meaning to get for the longest time that is a necessity for a good nail care routine: cuticle nippers!

img_20191107_005015

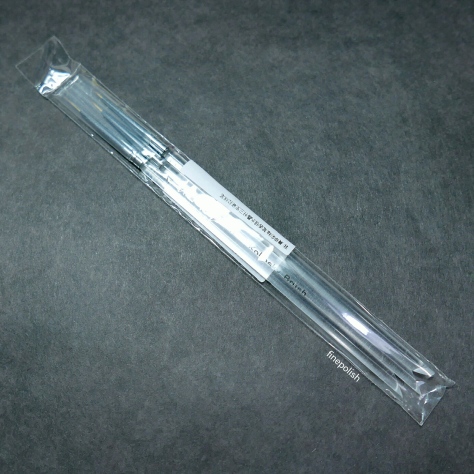
These cuticle nippers from Beauty Big Bang come in a reusable vinyl pouch.

img_20191107_005211

There’s information on the back of the card along with a bar code for the item. The tip of the scissors is covered with a protective plastic cover.

Yes, I know, everyone says you shouldn’t ever cut your cuticles and only push them back, but while I wouldn’t recommend doing this every time you do your nails, sometimes you get dry bits of skin around your nails that need to be removed. I usually try to trim these bits with either nail scissors or nail clippers, but neither tool does the job as well or efficiently as this!

These nippers are as easy to hold and use as a pair of pliers. The nippers have a default open position, so you only need to squeeze the handles together to cut your target. The handles have just the right amount of tension so that you don’t need a lot of strength to do the trimming, but they don’t immediately close together in your hand.

img_20191107_010150

What is extra appealing about the tip is how the cutting edge stays flush with your surface, allowing you to trim closely with precision. Care must be taken that you don’t cut into your living skin because the edges are sharp. As the instructions say, clip away small amounts at a time and do this in moderation. It is possible to get an infection if you clip away too much skin, causing an open wound, so please be careful!

img_20191107_005757


img_20191107_005614

The nippers should be positioned this way as you trim away dead skin.

It is easy to clean away the clipped debris when the tip is open.


img_20191107_005432

img_20191107_005954

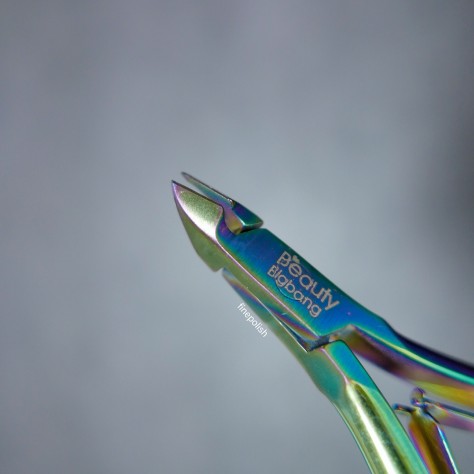
View of the cutting edge.

These nippers are made of durable stainless steel and have a beautiful rainbow chrome finish, and can also be used for cutting decals and striping tape, so they make an excellent addition to your nail art toolkit.


Diamond rating: ♦♦♦♦♦ (5/5)

If you are interested in purchasing this cuticle nipper SKU: J6517TM (retail price is $8.39 USD), the link for the item is shown below.  Using code CHRISS will get you 10% off your order, and Beauty Big Bang offers free worldwide shipping. Happy polishing!

https://www.beautybigbang.com/products/1pc-beautybigbang-rainbow-stainless-steel-nail-cuticle-nipper-cutter-plier-clipper-scissor-dead-skin-remover-trimming-manicure-nail-art-tool

Check out their deals for Black Friday and their Christmas sale at the link below!

https://www.beautybigbang.com/pages/snowsale

10% off coupon code: CHRISS

Easy Accent Nail Manicure

As previously mentioned, it’s hard to find time to do your nails when you’re taking care of squirrels! I decided to ditch my long nails so that I could work with my favorite rodents better, and I did a super quick and easy manicure to keep my nails from drying out from all the extra hand washing.

Everyone knows how hard it is to remove glitter polish, so I chose this gorgeous silver holographic flake polish as my base for some durability. The color is called Jubilee and comes from Cupcake Polish. 2 coats is all you need for a perfect manicure.

img_20190827_143129

Who needs nail art when you have a color like this?

Continue reading

Magical Butterfly Manicure

There’s something so fun about neon colors! They’re just so bright and happy, so I made a summery take on a butterfly and flower design simply by making the background a bright neon pink.

I chose Aimeili’s 057 Neon Very Berry to be the base color. This gel is a little sheer, so 3 coats really makes the color pop. Each coat cured in 1 minute in a UV/LED lamp.

img_20190812_001742

Continue reading

Tropical Floral Nails

Sorry for the long absence again, but I’ve been wrapped up in taking care of baby squirrels lately! Even though I’ve split the job with my fiancé, it’s exhausting being a squirrel mom, and it doesn’t leave much time for blogging or nail painting.

This design was a fairly quick one because I really wanted to do something floral in a fun color scheme that represented the heat wave that we had in August. I started by painting my nails with Aimeili’s 097 Candy Green Castle gel polish which is a bright neon green jelly. I applied 2 coats and cured each layer for a minute in a UV/LED lamp. You can probably get an even more vibrant look if you apply a 3rd layer of gel.

img_20190811_234618

This color reminds me of Slimer from Ghostbusters.

Continue reading

Inspired by a Color: Peach Floral Nails

When it’s August, I desperately want to go peach picking at my favorite orchard in New Jersey because their peaches are out of this world! I’ve truly never had peaches or nectarines from anywhere else that can compare to the ones that you find there, so I hunger for them all year until peach picking season comes back around.

The fruit was the color inspiration for this manicure, so I started by painting all my nails with 3 coats of ‘N Cream from Pretty & Polished. This indie brand is no longer in business, but boy did they make beautiful crelly polishes when they were online! This one is a milky white with peach glitters suspended throughout the mix.

img_20190811_023240

Crelly (cream/jelly) polishes are pretty sheer by definition, so it took 3 coats to get the white base to become opaque.

Continue reading

Unicorn Mermaid Nails

I’ve been holding off on using gel polishes after a bad skin reaction to the curing lamp a few months ago. I was really scared that my nails might fall off because my nail bed started peeling back, and the skin around the nails was itchy and getting hard before peeling off! Truly a nightmare. I’m a little wary about overdoing it with the lamp now (what, you’re not supposed to do gel manicures more than once in a day?), so I purchased some fake nails and decided to go about my swatches in this manner instead. Who knows, maybe I’ll end up doing sets for people now that I have all these fake nails!

In any case, I was super excited to use some holographic powder to create a fun and whimsical unicorn mermaid manicure, so as per the usual steps, I applied gel base coat from iMethod Beauty, cured that for 60 seconds, then applied and cured 2 coats of black gel polish. The color was 007 Blackpool from Aimeili, and it’s a trustworthy but affordable gel polish that provides the perfect base for chrome and holo powders.

IMG_20190328_013154.jpg

Disclaimer: this is an old swatch on my actual nails because I was too lazy to take a new photo of a polish that I already swatched.

I then applied a layer of no wipe top coat from iMethod Beauty and cured it for 60 seconds before burnishing in their holographic powder with a sponge applicator. After all the black polish was covered by holo, I swept away the excess powder with a brush and applied another layer of gel top coat.

img_20190805_182033

With a dazzling effect like this, who can say they don’t like holo?

Continue reading

Flaming Manicure

Not too long ago, I played the opera Die Walküre by Richard Wagner, the 2nd of 4 [very long] operas that make up Wagner’s Ring cycle. Everyone was expecting some appropriate nail art from me, so I chose to do a fire design based on the last scene of the opera. It’s the only place where I had to play the piccolo in my part, so it just made sense to me.

Because it’s a fiery scene, I started by painting my nails with a red based black polish called chelsea from nails inc. It’s perfectly opaque in 2 coats, although you can see more of a red tint if you only use one coat.

img_20190728_034703

Continue reading

Little Red Riding Hood Nails

If you’re a fan of the musical Into the Woods, you’ll recognize the scene on my nails from the Little Red Riding Hood feature where the wolf and Red sing “Hello Little Girl.” Even though this manicure is stamped, it was probably one of the most labor intensive stamping designs that I’ve ever done and uses several different techniques to bring the images to life.

I started with a rich shimmery forest green polish from Julep called Giselle. You only need to apply 2 coats of polish to achieve the same color that you see in the bottle, and it’s beautiful all on its own.

img_20190724_153651

Continue reading